Homemade Granola Bars

Awwwww yeah, summer is in full swing now, y’all. I successfully graduated college, *crowd cheers* and now in my search for a big girl job, I find myself at home with a *lot* of spare time. It has worked out well thus far, however, since the Ryan and I just moved into the new house last weekend. Everything is pretty well finished being painted (the rooms that count, anyway), and I have had the opportunity this week to do a crap ton of unpacking. ๐Ÿ™‚ I’ve run errands, met with people for services (like Verizon and plumbing :P), and generally tried to get stuff done around the house. I even hung a picture frame perfectly level. Ohhhhh yeaaaaah.

Anyway, one of the ways I occupied my time this week was walking around the new neighborhood, and on one of those jaunts, I walked up to the grocery store we’ve got here. I was going up there for chicken and other food items, but I decided to grab a couple things to make these quinoa granola bars I saw on Pinterest. I changed the recipe a bit, but overall, they looked awesome, and since the Ryan doesn’t like quinoa, I figured I could actually have something that was, well, just mine. That didn’t work, as it turns out, because though he doesn’t like quinoa OR coconut, he does like everything else in the bars, and has eaten them anyway. So..yeah. Marriage is sharing, y’all.

I changed the original recipe some to fit what I kept in my house, and my granola bars came out much more soft and squishy than the ones in the original recipe appear to have. I don’t know if it was the changes I made, or because she didn’t mention to refrigerate them (which works and keeps them nice and solid but still yummy and squishy), or if I didn’t cook them long enough, or what. Regardless, they’re delicious! So, let’s get started!

You will need:

IMG_20140604_170611158

  • 1 cup of coconut flakes (the original calls for unsweetened, but I couldn’t find unsweetened so I got what the store had)
  • 1 cup of coarsely chopped walnuts (she calls for cashews in the original recipe, but I didn’t have any – I did have walnuts)
  • 1 cup of slivered almonds
  • 1 cup of dried cranberries (original calls for cherries, but again, I didn’t have any – I had cranberries)
  • 2 cups of oats (she didn’t say whether they were instant or rolled oats, I have instant, so that’s what I used)
  • 1 cup uncooked quinoa, rinsed and dried
  • 1/2 cup flax seeds
  • 1/3 cup almond butter (I had peanut butter, so I used that)
  • 1/3 cup honey
  • 1/4 cup maple syrup
  • 1/4 cup coconut oil
  • Sea salt for garnish, if desired

Preheat your oven to 350, and line a 9×13 pan with wax paper.

IMG_20140604_171114927

Meanwhile, toast your oats and quinoa until cooked warmed and fragrant. Allow to cool.

IMG_20140604_180659309

After the oats and quinoa are cooled, combine them with your nuts, coconut, flax seed, and fruit.

IMG_20140604_182128171

In a small pan, add maple syrup, coconut oil, peanut butter, and honey.

IMG_20140604_182416284

Warm until melted, then mix together with the nuts and oats mixture until evenly coated.

IMG_20140604_185417940


Bake at 350 for ~25-30 minutes until the edges are toasted and brown. Remove and allow to cool completely.

IMG_20140605_100906316

I had to keep mine in the fridge to keep them solid, I am not sure what I did wrong, or if this is normal? But they’re delicious anyway. Once your bars are cooled and solid, cut them into strips.

IMG_20140605_125150733

As suggested in the original recipe, I decided to dip the bottoms of mine into chocolate. Mmmm.

IMG_20140605_170417264

I stuck them back in the fridge and let them harden. There you have it, delicious granola bars, all homemade and yummy! And healthy! Enjoy!!


1 Comment

Filed under Baking, Cooking, Food, Uncategorized, Wellness

Summer Smoothie Spectacular!

I don’t know about the rest of you, but it’s getting HOT here! Like, H.O.T. hot! ๐Ÿ˜‰ Do you know what that means? It means you’re going to want to cool down with some deeeelicious cold beverages. Now, I think the rest of you are with me when I say, “Ohmygod I love Slurpees, Frozen Yogurt, Italian Ice, Ice Cream” and all things just..freaking..amazingly cold and sweet!

But, sadly, as much as we want to deny it, those things aren’t healthy for us. They’re good, in moderation. Though, if you’re anything like me and swear that you’ll only have ONE SERVING and then eat it all anyway, that can be a *bit* of a problem.

This semester, with it being my last, and I have to say with it also being the hardest semester of my time in college, I have managed to just sort of stop caring. About me, about my body, about anything except homework. And it has had some consequences. I workedย so hard to lose weight for my wedding, and I’ve gained back all but 7 lbs. Sitting endlessly in lectures, in front of the computer doing hours of programming, staying up late, snacking on whatever is nearby when I get hungry, giving in to my cravings….yeah. It has been a rough semester. Fall wasn’t too bad, but ever since Spring swung around, it has just been downhill.

So here I am, almost a week from graduating, and ready to get back on the horse and whip my butt into shape – literally! (sans the whipping, because…ouch) Plus, now that I won’t have homework anymore, I have time to go running, or take yoga, or do Zumba, or all of it! I can have a life!! I have downloaded an app called “Couch to 5k” by Active.com (the same people that sponsor the Color Run and other shenanigans), and also one called “Just 6 Weeks” that teaches you to do crunches, push ups, etc., in 6 weeks. I have started logging my food on MyFitnessPal again, and have, for the most part, stayed on the straight and narrow for the last week or so. I have lost about 5 lbs, buuut I think it’s mostly just water. I have also had a couple of bad days (can you say someone had a cookout and made bbq chicken, burgers, and grilled corn on the cob? Ohmygod), but I’m not terribly angry at myself over it.

What does this have to do with smoothies? Well, I was browsing Pinterest (because who needs to study statistics when there’s Pinterest?), and I kept seeing recipes for smoothies. Mean green smoothie, flax smoothie, glowing green smoothie, delicious smoothie, smoothie this, smoothie that. I pinned ย bunch of the pins, but I wasn’t totally sold on any specific one that I thought I’d just love. So, I decided to kind of make up my own going off of other peoples’ recipes. And here we are. I don’t have anything to call it (like a snazzy name), but it IS good, and GOOD FOR YOU. I sat down and worked out all of the nutrition information (perks of taking a nutrition class, yaaaaay), and it’s loaded with nutrients. I’d recommend making it in the mornings, so you have a great way to start your day! My recipe includes green tea, which has caffeine in it. So there’s that benefit as well!

Are you ready? Let’s make a smoothie!

Yesterday, I went shopping for a bunch of fruits and some spinach (I’m taking baby steps – I know I like baby spinach, so I’m starting with that first), and brought them home and washed them. I usually just kind of scrub off my food before I eat it with water, but since I knew I was going to be slicing, freezing, and then storing my fruit, I figured I should give them a proper scrubdown. So I mixed 6 cups of water with 2 cups of white vinegar (3:1) and EWWWWWW! Check it out:

Image

That came off MY FOOD THAT I PUT IN MY BODY! When I poured it out there was brown sludge at the bottom of the bowl that looked like mud. Yeah, never just rinsing under water and rubbing with my hands again. Gross.

Image

Also, look how shiny everything was! ๐Ÿ˜€ I set my fruit out on the counter to dry and got busy with studying.

Image

I also made a container of green tea. It was exciting, because the first container I made, I just laid on its side in the fridge, but the hot water (I boiled water, steeped the tea, removed the bags, put on the lid, and stuck it in the fridge – but my fridge is stupid and things as tall as that container don’t fit, so I had to lay it down) caused pressure against the lid and BOOM! My kitchen and fridge were suddenly overflowing with green tea. It was amazing. T___T Not. Though, when I grabbed a nearby towel out of storage to clean up with, I found a $25 Bed, Bath and Beyond gift card, so all is not lost. I bought a serving bowl and a picture frame. Booyah. Anyway, I made this NEW container of green tea and left it on the counter all afternoon into the evening to cool down before I put it in the fridge. Lesson learned (for those of you wondering: one kettle full of water, 4 tea bags, steep 3 minutes, remove. Add a little honey if you want and mix).

Image

After all the veggies and fruit were dried off, I chopped them up and stuck them in the fridge on a cookie sheet and cutting board to get hard enough to put in bags. I also bought and chopped three different kinds of pears and grapes. The nutrition info I will be providing is strictly for the recipe with strawberries and blueberries in it.

Image

Once everything was frozen, I put them in their own bag for later use. The smoothie is much more smooth if your stuff is frozen. ๐Ÿ™‚

Image

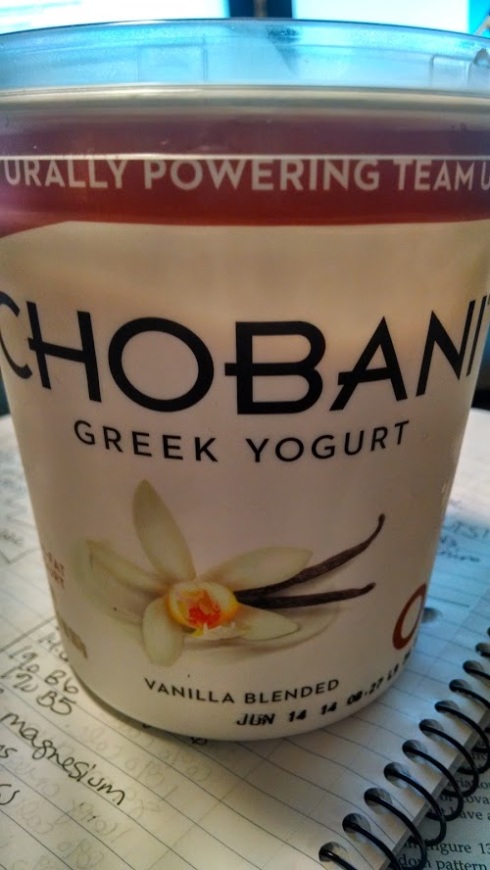
Meanwhile, you will also need some delicious yogurt. I prefer Chobani because it has less sugar and sodium than other brands, more protein, and important probiotics for your digestive system. Plus I think it tastes yummy. You can use whatever you want, though.

Image

Finally, you’ll need some protein powder. I make The Ryan protein bars for his workouts, and we have this sitting around. We prefer soy to whey, but whatever you wanna do, do your thing. That’s the nice thing about smoothies – there’s really no wrong way to do it.

Image

(Yes, that’s a Game of Thrones cup. Yes, that’s house Stark. Winter is Coming; Though Tyrion is my favorite. I haven’t read all the books, don’t tell me if he dies, I would lose it!)

When you’re ready, combine:

  • 2 tbls agave
  • One serving protein powder (for us that’s 2 tbls)
  • 1 tbls ground flax seed
  • 2 cups baby spinach, tightly packed
  • 1 cup frozen strawberries
  • 1 cup frozen blueberries
  • 1/3 cup greek yogurt
  • 1/2 cup sliced cucumber
  • 1 cup green tea

Throw it in the blender and process. NOMNOM. This recipe makes 4 cups, and I define one serving as 2 cups. Don’t worry, the other 2 cups will fit nicely into a mason jar. Add a little lemon juice to the leftovers and give it a whirl in the blender to help slow down oxidation, fill your mason jar all the way to the top to keep air out, and put a tight lid on it. VOILA, now you have one for later too! Stored in your fridge, itย should last up to 24 hours. Check it before you drink it, though!

One serving of this smoothieย as written contains:

  • 18.5g of protein
  • 31g sugar
  • 154mg sodium
  • 5.5g fiber
  • 57.5% DV of Vitamin A
  • 16% DV of Calcium
  • 108.5% DV of Vitamin C
  • 19.5% DV of Iron
  • 887mg of Omega-3 fatty acids
  • 287.3mg of Omega-6 fatty acids
  • 1% DV of Vitamin E
  • 24% DV of Vitamin K
  • 6% DV Thiamin
  • 1.5% DV Riboflavin
  • 2% DV Niacin
  • 3.5% DV Vitamin B6
  • 6% DV Folate (especially good for you if you’re pregnant!)
  • 3% DV of Vitamin B5 (Panthothenic Acid)
  • 28% DV Magnesium
  • 6.5% DV Phosphorous
  • 12% DV Potassium
  • 4.5% DV Zinc
  • 10.5% DV Copper
  • 44% DV Manganese
  • 2% DV Selenium
  • 12.5 mg Caffeine
  • And amazing antioxidants and probiotics!!

So there you have it, whyย wouldn’t you start your mornings with this from now on? What are you waiting for? Go get started!

(P.S. I would like to shamelessly plug my Ninja blender, which I got for Christmas. I LOOOOOOOOOOOOVE IT!! It makes things nice and smooth mmmm)


Leave a comment

Filed under Cooking, Fitness, Uncategorized, Wellness

Walking While Fat and Female – Or, Why I Don’t Care Not All Men are Like That

Read this and thought she made some good points. It’s not just Seattle where this happens, I can tell you some stories of my own.

Leave a comment

Filed under Uncategorized

Short Update!

Happy Thursday, everybody! Alas, I have no new food for you today, however I DO have some stellar news, so I’m going to just do a short update!! There’s a lot going on in our life right now, the most exciting of which (for me, at least) is that in 12 more days I will take my last final, and in 15 more days, I will be walking to GET MY DEGREE! ๐Ÿ˜€ I have worked very hard for this, and it’s almost surreal that it’s actually going to happen. I’ve got my cap and gown, and I’m actually working on a project as we speak. The cool thing about programming stuff is that when it runs, it can take a while. And while that while is happening, you have free time to just watch it do its thing while you wait to see if it works 100% or not.

So here I am, running a Python script I’m putting together for a final project, and typing to you lovely people. First thing’s first: Good news numero uno! Baby Cambria, who I announced to you back in December had neuroblastoma cancer, has been deemed CANCER FREE as of March 28!! ๐Ÿ˜€ Yaaaaaaaaay!! We had a “Kicked Cancer’s Ass!” party a couple weeks ago, and whatta ya know? MOMMY AND DADDY S ARE PREGNANT AGAIN! Cambria is going to be a big sister!! ๐Ÿ˜€ That’s exciting news #2!

ImageDon’t you just LOVE this cake? ๐Ÿ˜€ Myself and the hostess with the mostess, Dawn, designed it together with the cake people. Local Marylanders, check out Kake Korner, they are incredibly talented and lovely ladies to work with! They did this cake, Mommy S’ baby shower cake, and our wedding cake! And it’s sooooooooooooooooooooooooooooooooooo *gasp* ooooooooooooooooooo yummy!!!

Image

The little lady of honor herself! Hanging onto the present I got her (a Peter Rabbit book that has all sorts of different textures she can feel), that she will probably drool all over! ๐Ÿ™‚ Because that’s what babies do.

The next set of exciting news comes along with the Ryan and I yet again moving. BOOOOOO for moving, because it’s a pain in the ass, but YAY because it’s into a house!! ๐Ÿ˜€ We found a lovely townhouse in a really nice neighborhood, and while we’re only renting, I’m looking forward to being a part of the community. Sans the HOA, though. Blegh. Anyway, we’re in the process of painting the house, so I’m going to give you a few before and after shots to keep us motivated! Pardon the fact that it’s sort of a war zone, we ARE working, after all. We are repainting almost the entire house: the living/dining area, the kitchen, and the master bedroom. It doesn’t sound like a lot, but when you realize that the house is 3 stories and there are walls for DAYS in the stairwell (which we have to paint also), you’ll see how much work it is. The homeowner painted the *entire* downstairs and stairwell this horrid green color that was a nice minty green color in the morning and morphed into this olive brown green baby vomit monstrosity in the afternoon. So, we’re changing it up a bit and lightening things up.

First set – the bedroom (and you can see the icky vomity green brown whatever in the hallway/stairwell in the first shot here):

Before:

ImageImage

After:

ImageImageImage

I loooooooooooooove how the bedroom came out! Crappy cell phone pictures aside, it’s really gorgeous. And I have since put all of the face plates back on the wall. They are presently that weird eggshell off-white beige color, but when we update some of the wiring, I’m going to switch them out for a nice bright white to match the trim. The wall color is exactly what I imagined, which is super fantastic because I had only seen photos of it on the computer. It’s Valspar’s “Wet Pavement” color, which is much more, erm…grey? on the swatch. It’s lovely, though. We’ve got dark furniture and vibrant sheets, so our bedroom is going to look FANTASTIC when all of our furniture is in there. ๐Ÿ™‚

Next up how about just the whole downstairs, haha. You can see the green color like whoa here:

Before:

ImageImageImage

Yes, that’s my husband with his face in the closet. ๐Ÿ™‚ There’s storage under the stairs. Love it!

So far (I say so far because it’s primed/half painted, but it is not in any way finished!!):

Image

lr2livingroom

Yes, it’s a hot mess. ๐Ÿ™‚ But there is some GOOD news out of the mess, the kitchen and bay window are painted. I picked Sherwin Williams’ color “Latte” for those rooms, and had it mixed at Lowes so I didn’t have to spend $50/gal on paint. ๐Ÿ™‚ And yes, I’m going to get rid of those heinous light fixtures. Grossssssss!

After:

ImageImage

So there you have it, our progress so far. I am loving the latte color, and I adore the bedroom! I am super excited to have gottenย some paint on the walls and seen the actual color over the primer. Already the whole house looks brighter and more welcoming! The living room and stairwell are/will beย Sherwin Williams’ color “Kilim Beige,”, and I think it will make the kitchen and bay window really pop once it’s on the walls. This project has been very hard, physical work so far (I found muscles in my thighs I didn’t even know I had until I spent all Saturday running up and down the stairs), but it will be totally worth it! After we’re all moved in and settled, I will update with more photos! I have an area rug picked out, and some other things that I think will make the house look so much more cozy when we’re finally in, and I am looking super forward to showing you all!

Meanwhile, don’t forget that Sunday is Mother’s Day! ๐Ÿ™‚ Cook your mama a nice meal, take her out, buy her flowers, and be nice to her! She brought you into this world. ๐Ÿ˜‰ To all the mommies out there: I wish you a fantastic day on Sunday!


Leave a comment

Filed under Uncategorized

The easiest Easter cupcakes ever!

Hiya, everybody! ๐Ÿ˜€ It’s Easter weekend!! The bunny is coming, and bringing sugar to small children that will make them bounce even further off the walls than normal! Friends are gathering, people are worshiping, and the flowers are blooming.

Thank goodness it’s finally spring…Cross fingers, anyway. It was 34 with a wind chill of 28 just four days ago here…*sigh* Four more weeks and I will be done with my degree! It’s so close I can taste it! And then I can blog all the time again! ๐Ÿ˜€ And have hobbies! And a life!

Anyway, my friend Dawn is having an Easter dinner tomorrow night, and I have volunteered to make dessert! Only because I found the most adorable recipe on Pinterest and *had* to make it, though! And, of course, I will be cheating a little bit just to make things easier. ๐Ÿ™‚ The cupcakes will resemble teeny weeny egg nests, and I am *SOOOOOO* excited! I hope that people will eat them and enjoy them, and think they’re as cute as I do!

So what are we waiting for, let’s get started!

IMG_20140419_151600275

First, get some cake mix. I grabbed yellow cake because it’s my favorite. ๐Ÿ™‚ Next to carrot cake (but people probably wouldn’t want carrot cake for Easter). Then I cheated and got Easy Frost icing cans in chocolate (to be the brown nest!), and finally, some Robin Eggs.

IMG_20140419_154923715

Mix the cake mix according to the package directions. Mine called for 3 eggs, 1/2 cup of vegetable oil (I used canola), and 1 cup of water.

IMG_20140419_154958783Put your cute little cupcake liners in your pan and fill them ~1/2 way with the cake mix. As you see above, I didn’t have a ladle small enough so I used a gravy ladle. Heh. My mom used to use ice cream scoops. Use whatever works.

IMG_20140419_154935986

Bake them for 12-17 minutes, until they are done and a toothpick comes out clean. The mix should make ~24 cupcakes. Cool them for 3 minutes before transferring to a cooling rack. ๐Ÿ™‚

IMG_20140419_170043079

In the middle of making the cupcakes, I decided that the ladle wasn’t working for me. My mom needed to go to the local mall for something, so I offered to drive her and we swung into Bed, Bath & Beyond for this little gem. EASIEST LADLING EVERRRRRRRR! Seriously, I don’t know why I waited so long for this.

IMG_20140419_181318311

When the cupcakes had cooled completely, I went ahead and started with the icing. I’ve never used the canned stuff before, but it turns out to be pretty darn easy! ๐Ÿ™‚ Press down, out it comes. Bonus! It has a star tip on it!

IMG_20140419_181548924

Work the icing around the top of the cupcake like a bird’s nest, and then put two of your whopper Robin Eggs on top. Voila! ๐Ÿ˜€ Easy, quick, cute, affordable, and totally fun for Easter!!

IMG_20140420_122521798

And there you have it! A nice little set of eggs nests, all ready for your Easter! And since I will be taking them somewhere, I bought this AWESOME cupcake transporter, that has its own separate little cupcake tower that you can use by itself, or keep in the carrier! Genius!!

I hope everyone has a fantastic weekend! Happy Easter!

Happy-Easter-23


Leave a comment

Filed under Baking, Cooking, Food, Holidays, Uncategorized

No Knead Artisan Bread

NOMNOM CARBOHYDRATES NOMNOM.

Let’s be honest, who *doesn’t* love a good loaf of bread? Who doesn’t love the smell of it as it bakes in the oven? Who doesn’t love the sensuous feeling of warm bread dripping with butter melting on your tongue….

Okay, sorry, I got lost in a fantasy world for a second daydreaming about bread.

In case you can’t tell, that’s the topic of today’s blog! ๐Ÿ™‚ Easy bread, to boot! As most of you know, I have possessed a Lodge enameled cast iron dutch oven since last winter. Best. Purchase. Ever…in case you were wondering. Anyway, I am always on the lookout for things to make in my dutch oven. It is AMAAAZING for braising ribs, I recently tried an Irish beef stew in it (it was so delicious!), often make soups with it, you name it, I use the dutch oven for it. So as you can imagine, when I came across this little beauty on Pinterest, I pinned it right away with the intention of trying it VERY SOON!

And then school started up again, I got bogged down with homework, the usual stuff. The bread idea was placed on the figurative back burner and all but forgotten. But a few days ago, my best friend finally got her first dutch oven! She was so excited! I was so excited! OMG YAY DUTCH OVENS ARE EXCITING! She wanted suggestions for things to cook in her new toy, and while linking her various recipes I remembered: THE BREAD! “Ohhh yeaaaaah,” I thought “I want to make this too!” So I did.

As many of you know, the eastern seaboard has yet again been graced by Father Winter, who is cranky and stubborn and justย doesn’t seem to want to leave this year!!ย Last Wednesday, it snowed…didn’t stick, just snowed and looked menacing, and it took me more than two hours to get to school for a 50 minute class. I was very, very upset. So last night, I decided that I wasn’t going anywhere today if the flakes started falling, and then school closed, so I didn’t have to worry about it anyway. Given that this particular bread requires 12-18 hours of rise time, it seemed like a perfect opportunity to make it. Start it yesterday, let it sit overnight, finish it up today, watch the snow, smell the bread, be warm from the oven – perfection!

The only trouble was, I needed more whole wheat flour. UH OH! I went to the store and got some, but not before experiencing the mad house that is Maryland people before a winter storm. For some reason, snow = end of days in this state, and everyone panics and buysย everything from the grocery store the day before. It’s stupid – GUYS, I PROMISE: THE SNOW WILL MELT AND THERE WILL BE NO SHORTAGE OF FOOD. Thankfully, since everyone was at Giant panicking, I was able to get in and out of Target at a relatively good speed. Remember that next time you can’t park at a grocery store the day before snow, folks – Target has a grocery section. They sell flour. ๐Ÿ˜› Nyeh nyeh.

And so the process began:

I don’t have any photos of the ingredients, but know that you will need 6 cups of bread flour, 1/2 tsp of instant or active dry yeast, 2.5 tsp of salt, and 2 & 2/3 cup of cool water. I subbed 3 cups of whole wheat flour for 3 of the cups of bread flour. Mix the dry ingredients together and then add the water.

For not the first time yesterday, I found myself wishing I had a KitchenAid mixer. Doesn’t everyone want one of those at some point? Ugh, Iย needed that bread paddle yesterday (though a much cheaper alternative that I am going to look into is a danish dough whisk. It’s $10 to the KitchenAid’s $400). Let it be known, though, that the puny dough hooks and wimpy motor on my hand mixerย actually worked long enough to incorporate the dough. I didn’t have much faith in it to start, but as long as I nursed it along patiently, it did well. I finished up by wetting my hands (the dough was ever so slightly too dry) and getting the rest of the dough ball mixed up. I had to add one extra tablespoon of water to get the right consistency (I find whole wheat to be a “thirstier” flour).

IMG_20140302_164428723

Okay, so maybe it’s not the most glamorous thing in the world, but let’s face it, folks…It’s a ball of dough. YIPPEE. I then covered it with plastic wrap and set it on top of my fridge (it’s the warmest spot in my kitchen and also out of the way of fur balls that think it’s okay to walk on the counter tops).

IMG_20140302_200132942

It is supposed to rise for 12-18 hours….Look at that bad boy go! I was curious, so I peeked while I was making dinner. I couldn’t help myself!

IMG_20140302_235932285

And then I checked again before bed….JUST TO BE SURE THE YEAST WAS WORKING! (We have had yeast in our freezer for ages. By the way, if you’re going to use yeast that you’ve frozen, let it get to room temperature first, okay? Okay. Also, if you’re unsure as to whether it is still active or not, follow this simple instruction guide to tell if your yeast is still viable.)

IMG_20140303_085815936Good morning, snow day! I like what you’ve done with the place.

IMG_20140303_091507192

And here is that beauty this morning. Looks gooooooood. You will know your dough is ready when it’s all bubbly and smells super yeasty. To me it smelled like beer, so I knew it was good to go.

IMG_20140303_100803607

On a well floured surface, and with well floured hands, roll that bad boy out of the bowl and work it into a ball. Flour a piece of parchment paper or a tea towel and put the dough ball seam side down on it. Cover with another towel and let rise for 1-2 hours until it has doubled in size. I have a lot of homework to get done today, so in order to make sure I kept the correct schedule for this bread, I anal retentively set an alarm for an hour and 30 minutes.

IMG_20140303_113557947

Why an hour and 30 instead of 2 hours, you ask? Because for the last 30 minutes of the rising process, you’re going to want to place a dutch oven (or any heavy oven proof pot that has a lid) in a cold oven and bring it up to 425 degrees. If you’re not sure whether your dutch oven’s handle can…well…handle 425 degrees, wrap it in aluminum foil. I *think* mine is okay, but…just to be sure, I wrapped it anyway. Because I like my dutch oven and I want it to last for a long time.

IMG_20140303_121005782

Eeyup, I’d say that effectively doubled in size! (After 2 hours)

IMG_20140303_121115090Slide your hand under the parchment paper and flip the dough into the dutch oven. BE CAREFUL, IT’S HOT! DON’T TOUCH THE EDGES!! Now the seam will be up. Put the top back on and stick that bad boy in the oven for 40 minutes. Mmmmmmmm, do you SMELL THAT??? *drool*

IMG_20140303_125204350After the 40 minutes has passed, take the top off and cook for 10 more minutes to make a nice crust. HOT DAMN, LOOK AT THAT! I almost didn’t want to put it back in the oven!

IMG_20140303_130255477ย But I did. And man was it worth it….It’s so beautiful! *tear*

IMG_20140303_130440649It is now going to take every collective ounce of self control and restraint available in this house to let this cool downย all the way before we cut into it. Once the Ryan wanderedย out here and spied it, there might just beย was mutiny (“What? Why do we have to wait? What’s this nonsense? I don’t know what you’re talking about!” *grumbles and walks away pouting*). But I will emphasize again: DO NOT CUT INTO IT UNTIL IT HAS COOLED! Doing so will ruin the bread’s consistency and make it gummy and dense. Nobody wants that, do they? Didn’t think so.

IMG_20140303_161405728

After hours of being pestered by the Ryan, the bread was finally read to cut. BEHOLD THE DELICIOUSNESS. I spread a little honey on mine. Mmmmm, good. ๐Ÿ˜‰ The Ryan hasn’t spoken in a few minutes, so I will interpret that to mean he enjoys it.

Well, what are you waiting for? GO BAKE SOME BREAD!!!

Leave a comment

Filed under Baking, Cooking, Food, Holidays, Uncategorized

Chicken Parmesan

Hello there, everyone! ๐Ÿ˜€

It’s Sunday, and it’s supposed to be a lazy day, but alas, it is far from it! Actually, it has been a half lazy day. We’re cleaning our house, but we’re doing it slowly. We’ve got guests coming on Tuesday, and we helped our friends move to a beautiful new house yesterday (omg I want one!), so it has been an active weekend. Needless to say, we’re not in the biggest hurry to clean our own house today. The living room looks good, though, as does the hallway. I’m half cleaning the kitchen in between errands, eating lunch, and surfing the Gardening section of Pinterest.

The other night, when the Polar Vortex was still visiting us, I made the Ryan and I chicken parmesan, but lightened up, SkinnyTaste style! I love Skinny Taste! I wish I could just jump through the computer screen and eat all the food she posts! And I love her alternative and low calorie spins on traditional foods! Since it was about 7 degrees outside, a 450 degree oven didn’t actually sound all that bad! Plus, it gave me a chance to use my new rack for the oven! Win/Win, right?

Anyway, let’s get started!

IMG_20140108_184105059ย First, let’s get started with ingredients. The SkinnyTaste Recipeย called for seasoned whole wheat bread crumbs. I didn’t have that, though, so I used Panko bread crumbs that I crushed up to be a bit smaller, and then added some Italian Seasoning to the plate. It’s lazy seasoned bread crumbs, yay! And a special thanks to my friend Emily, who always sends me Penzey’s Spices for Christmas/Birthday/Wedding, whatever. I *love* them. They smell good, they taste amazing, and they are excellent quality! Anyway, I used their Italian Seasoning and it was sooooooo good.

IMG_20140108_184708963ย My chicken breasts were a bit fat on one side and I was worried about them cooking unevenly, so I put a sheet of wax paper over them and went to town with my meat tenderizer (the flat side not the pointy side) to get them evenly thick.

IMG_20140108_185300646ย I melted two tbls of butter and used a kitchen brush to paint the butter on each side of the chicken. I then dipped the chicken in the bread crumbs. I totally forgot to put the parmesan cheese in the bread crumb mixture, so I just sprinkled some on top. I lined a cookie sheet with foil and then put the chicken breasts on my baking rack. I then stuck them in my 450 degree oven for 20 minutes.

IMG_20140108_191824165While the chicken was cooking, I put some of the marinara sauce in a small pot to be warmed, and started some noodles. Gina’s recipe calls for linguine, but I had some leftover whole wheat “egg” noodles from some soup I made a couple weeks ago, and decided to use those instead. I got a pot of water boiling for those and then put them in.

IMG_20140108_191750508

I also grated some mozzarella cheese, which is super un-fun since it’s a soft cheese. A trick I learned thanks to the masterful internet is to freeze the cheese a bit before you grate it to make it easier. Thank you, internet!

IMG_20140108_192219172After 20 minutes, I flipped the chicken and spooned one tablespoon of marinara sauce over each breast, and then topped with mozzarella cheese. I put them back in the oven for an additional 5 minutes.

IMG_20140108_193002113ย Et voila! I drained my noodles and plated them up with the marinara that I’d warmed in my pot, placed the chicken over the noodles, and topped with some freshly chopped parsley.

Easy, quick, warm, delicious! The Ryan was amazing and surprised me with Episode 2 of the new season of Sherlock, which he had DVR’d without me knowing! AHHHHHH BENEDICT CUMBERBATCH! *Swoon* Let’s be honest: Smaug (bonus points since John Watson is also Bilbo Baggins! :D), Khan, AND Sherlock Holmes? Oh yeah, baby. He’s the celebrity crush that will never be fulfilled. And that’s okay! ๐Ÿ˜€

sherlock-benedict-cumberbatchย  ย Well, I guess I’d better go finish cleaning…….or something………*sigh* Have a great day!


Leave a comment

Filed under Baking, Cooking, Food, Uncategorized

Sausage Egg “McMuffin”

Goooooooood evening, friends. I’m actually going to make a breakfast (in case you couldn’t figure out by the title)!

I found the recipe on Pinterest (don’t I find basically everything there? I mean, come on), and it’s actually a Paleo recipe. The Ryan and I do not eat Paleo, so I am not going to follow the recipe exactly (I only have margarine, not ghee, and I bought my sausage from Giant. It’s the Bob Evans kind. It was on sale), but the principle will be the same.

In fact, I ordered pastry rings specifically to try this. But in all honesty, I needed some pastry rings. So this just happened to work out! I’m excited to try them, and I figured I could pre-make these, wrap them up in some foil, and send the Ryan and myself to work with them tomorrow and Friday. We can nuke them up in the microwave real quick at work, and they’re nice, filling protein without the added carbs of buns. ๐Ÿ™‚ Sounds win-win to me (and they’re only 220 calories, so I’ll happily add in my normal morning oatmeal for some nice, filling fiber. OHYEAH, FIBER. You know you wanna eat it).

BUT! Before I get started, Iย have to show you the greatest thing I just discovered. I’m probably late to the game, but the Ryan and I don’t generally set foot in the yogurt section of the store…the closest we come is when we buy milk or half and half, and that’s still down the aisle from yogurt. We were eating it more often a little while back, but that was before I had to take a massive hours cut at work. Sadly, yogurt (the good kind, at least) is expensive. ;__; When I graduate, I’ll eat so much yogurt…Mmmm.

Anyway, check these out:

ImageThese are so good. I have so far only tried the vanilla golden crunch and a raspberry chocolate vanilla one (which isn’t pictured. BECAUSE I ATE IT), and I like the vanilla one the best. But I’m lookingย sooooooooooooo forward to the rest of these. Chobani, you’ve got the right idea, friends. Don’t stop making these! ๐Ÿ˜€ They make my heart happy.ย 

And another gratuitous off-topic picture, I just walked into our bedroom and look what I saw:

ImageIn my next life, I would like to be our cats. Thanks.

SO! Let’s get started with those work breakfasts! (Complete with iTunes spewing out Angry Scottish Pirate Metal. Oh, you’ve never heard of it? It’s definitely a genre.)

Image

First, let’s cook the sausage patties. They came pre-shaped, but as it turns out, my muffin rings are a bit wider, so I smooshed them down to make them a little wider and to help them cook a wee bit faster. I melted some butter before putting them in there, btw. Well, margarine. But you get it.

Image

When the sausages were cooked, I set them aside and placed the rings in the pan, after melting a bit more margarine. I forgot to grease the rings – oops! Note to self: next time, use Pam. I then cracked the eggs on in there and seasoned them with salt & pepper.

Imageย (Hah, yeah, the top right one went under the ring, ooooooooooops!!)

After the eggs solidified a bit, I poured in 1/4 cup of water and *tried* to cover them. Hah, I don’t have a lid that large, so I just set them over. When that didn’t seem to be working, I flipped a stainless steel bowl (that was the correct diameter) on top of the pan and set that over everything. ๐Ÿ™‚ย 

One thing I hate about this stove: It’s UNEVEN!! But the leg is broken so we can’t fix it. And we’re renting, so I’m not inclined to fix it. Not my problem. But oh man does it annoy the al;skdjf;lasdkflkjfff!!!! out of me.

Image

Ahhhhhhhhhhhhh, there. Cooked. Granted, they’re not the picture of perfection, and I might use a different pan next time, but…They look good, no? ๐Ÿ™‚ At least, I think they do. Edible, anyway (so my pictures aren’t super fancy. I’m an archaeologist, not an artist, sorry).

Image

ย 

I gave the Ryan the better ones, because I always give him the better cooked ones of all things. That’s probably why he sticks around. That, and he’s married to me now. MWAHAHAHAHAHAHAHAHAHAHA!

Image

So they’re not the most beautiful, but I’m still looking forward to eating them. I wrapped them in foil and stuck ’em in the fridge. Tomorrow I will nuke for 30 seconds and NOMNOMNOM. I hope the Ryan will do the same, but he would probably just eat them straight up. Because that’s how he rolls.

HAPPY BREAKFAST!

ย 

Leave a comment

Filed under Uncategorized

Sesame Chicken – Done Easy!

Man, guys, I’m telling you. Today is surely not Monday but boy does it feel like it. Today was one of those days where you are certain by 9 am that you will need a glass of wine by the end of the day, even if you don’t know why. As it turns out, it was an ever-so exciting day at work, what with the men’s bathroom on the first floor catching on fire, and pipes bursting in at least three separate places of the building, flooding the third and second floors (that we know of)…After standing outside in 11 degree weather complete with a windchill of -5 (cold as heck but thankfully not as cold as it was this morning when I left for work) for about 30 minutes, just as we were starting to complain about not being able to feel our toes, we were all directed back inside and told to resume our business. Yep, the Federal Government will close for an inch of snow and clear roads, but won’t send its employees home after a fire and some flooding.

To top that off, I tried to grab a prescription on my way home, and since they didn’t have my new insurance yesterday, rather than call me, they just set it aside and decided not to fill it. You know, until I came in to get it and then told me I’d have to wait. That’s okay, I’ll get it tomorrow.

SO! How’s that Polar Vortex working out for YOU?

The good news, however, is that when I got home from work today, I received an email from my school congratulating me on being in the top 15% of my class. ๐Ÿ™‚ Well thank you! That made my evening slightly better. As did coming home and not finding any of my pipes burst or any leaks (yet) anywhere in the apartment. The night is looking up. Maybe when the Ryan comes home from work we can snuggle and enjoy some good ol’ bad TV together. And, of course, have dinner.

Tonight, I was feeling like something quick, tasty, and warm, so I opted for stir fried sesame chicken. Of course, I found the recipe on Pinterest, because with this cool winter break thing that I’m doing, I actually haveย free time at the end of the day. What I’ll do with myself after I graduate in May remains a mystery. Hopefully perfect my ability to make omelets (because last night I tried for the first time, and let’s just say that the Ryan is a gracious guy. I didn’t find the omelet I made him in the trash this morning, so I think that means he ate it. What a trooper). I kind of suck at omelets at the moment.

So let’s get started!

Image

First, for the chicken, you will need 1 lb of chicken thighs cut into 1″ cubes. I didn’t have a pound, so I used 10ish ounces. Mix together one large egg (I did two) and two tbls of cornstarch in a bowl, then add the chicken and toss.

Image

Heat 2 tbls of oil in a wok and let it get hot. Then add the chicken. DON’T BE TEMPTED TO MOVE THE CHICKEN ALL AROUND!! That is my worst offense, and I messed it up the first time I did it. Leave it be for a few and let it get nice and crispy golden before you go tossing things around. When you turn it over, then would be a good time to add any veggies if you want to. I added snap peas.

Image

While the chicken is cooking, mix up the sauce. You will need 2 tbls soy sauce, 1 tbls water (I used rice wine instead), 1/2 tbls sesame oil, 1.5 tbls brown sugar, 1.5 tbls rice vinegar, one inch piece of ginger, grated, and one garlic clove, minced. I didn’t realize I needed the ginger and garlic until my chicken was almost done, so I added garlic powder and ginger powder. It’s a sin, don’t do it unless you must. It’s soooooooo much better with the fresh stuff. Also, add two tbls sesame seeds.

Image

I forgot to take a picture of the chicken with the sauce and (in my case) snap peas in the wok together, all nice and pretty. But here they are in a bowl of rice looking beautiful. I sprinkled more sesame seeds on and cut up some green onions for garnish. YUM.

——————-

See? Wasn’t that quick? (P.S. Sorry for crappy phone pictures, the Ryan and I’s camera died in the airport on a layover going to our honeymoon. We photographed our entire honeymoon with our phones ๐Ÿ˜› And didn’t replace our camera).

Enjoy!!

Leave a comment

Filed under Uncategorized

Holy Yum Chicken (And Happy New Year!)

The title speaks for itself. It’s not my recipe, though. Chances are if you’re on Pinterest, you’ve seen this gem floating around being pinned hither and yon. It’s totally worth pinning. Fifty times. Yeah, I said fifty times. I wish I could make it fifty times a week, but then we’d probably get tired of it, and that would be a shame. Also there aren’t really that many meal opportunities in a week, so…:(

The Ryan and I decided to stay in and have a quiet evening tonight. Our friends are off with their families, other groups of friends, whatever. We weren’t invited anywhere, and that is fine with us. With all the things going on recently, it’s nice to just be able to lay on our couch and do nothing. This evening has consisted of watching Star Trek: Voyager and Stargate: Atlantis. Yeah, SG-1 is better, but Netflix got rid of it. ๐Ÿ˜ฆ CURSE YOU, NETFLIX! Though we got Atlantis on Amazon Prime, so. Meh. Oh, and now a documentary called Secrets of the Sun about how the sun is going to destroy life as we know it by smacking us with a solar flare and killing our electronics (the Ryan always finds the good documentaries). Science!!

Anyway, since it’s a “special occasion,” (though to be fair, 2013 was kind of badass. I got engaged to and then married the Ryan, I met Mommy and Daddy S’s baby Cambria when she was just brand new and a day old and have watched her grow alongside them, I made some amazing new friends, got closer to existing friends, took one more step toward my degree, and got to sit on a tropical beach paradise in Jamaica for a week. I mean, come on! That’s awesome!) I decided to make this recipe. I tried it a while back when we first moved here, and the Ryan liked it so much he actually put it as his favorite food (out of all the things I’ve ever made him! Lol!) on the questionnaire game we did for my bridal shower. Clearly, he digs it. And I don’t blame him, I love it too. It’s called “Holy Yum Chicken,” and oh man, does the title totally do it justice. But enough of me raving about it, you should make it yourself. And here’s how:

Image

I was a little bit tired, and had mixed the ingredients before I decided, hey, I should blog this! It has been a looooooong day. Actually it has been a long week, y’all. Santa was good and all, but I’m tired! Anyway, for the sauce you’ll need 1/2 cup dijon mustard (Emeril’s is my favorite: I can actually read all of the ingredients on the label, and I think it tastes better. Especially in this recipe. No, Emeril isn’t paying me to say that. But wouldn’t it be badass if he did? Hellooooo, money! But I digress). You will also need 1/4 cup of pure maple syrup.ย REAL. MAPLE. SYRUP. Not Log Cabin (as much as I love it) or sugar free nonsense, the real deal. And then 1-2 tbls of rice vinegar. I like to use 2 tbls because I find one leaves the sauce a bit too sweet for my liking. But it’s up to your taste. I like the tang. Add that deliciousness to a bowl and whisk it till it’s nice and smooth and ya can’t whisk no more!

Image

The original recipe calls for 1.5-2 lbs** boneless, skinless chicken thighs. I made the super fabulous mistake of only thawing out one chicken thigh that was folded in on itself and looked like two. WHOOPS! I frantically ran out to the grocery store to get more (as my oven was heating to a whopping 450 degrees, yep, you read that right), and elbowed my way through the New Years Eve crowd to find: bone-in, skin-on chicken thighs. Well, crap. But that’s all there was that was organic, so I bought it and just dealt with it. I cut off all the skin and fat, and voila (having the bone there didn’t make a difference that we could tell anyway).

Image

Line an 8×8 pan with a double layer of tin foil (trust me, do it. Two layers), and stick your beautiful chicken thighs on in there. Salt and pepper each side, and then pour your mix right in. Move them around to get them nice and coated with the sauce on both sides. Mmmmm, look at that. Stuff those bad boys in the oven, uncovered, for 40 minutes.

Meanwhile, I cut up some potatoes and tossed them in olive oil, seasoned salt, garlic powder, pepper, and a dash of paprika and stuck them in my new (YAY WEDDING STUFF!!!) Le Creuset 9×9 bake pan. ๐Ÿ˜€ Lined with foil, of course, but I love that thing! Best. Cleanup. Ever. Anyway, I baked those for 30 minutes (so 10 minutes after the chicken went in – it’s real easy to prep when you’re lazy and chop them with the skin on :D).

Image

Mmmmm, out of the oven. Look at those bad boys. While it bakes, you will be drooling, it smells soooooooooo amazing. Let them sit for about 5 minutes, and then remove them to a plate and cover (or don’t, because you know, 450 degrees is frickin’ hot!). Return the pan to the stove, and add 1 tablespoon of cornstarch to 1-2 tablespoons water (this is the only part of the recipe I diverge from, because adding cornstarch directly to the leftover sauce has only ever left me with lumpy grossness, and you’re not really supposed to do that anyway), and whisk to incorporate until the sauce thickens. I’m too lazy for all that, so I just whisk it in and then turn the heat up a smidgen and let it come to a slight boil to thicken (don’t worry about safety, the sauce boils for a long time at 450 in the oven), and then whisk it more and remove it from the heat.

Image

Pour your sauce over your chicken, and voila! Dinner. ๐Ÿ˜€ And it’s soooooooooooooooooo good!!!! ย Holy Yum!!! Go make it NOW!

**Normally, I only make 2 thighs and I halve the recipe, but today since I had to go to the store, I ended up making the whole thing. And now the Ryan and I have lunch for tomorrow! ๐Ÿ˜€

———————————————————-

Image

HAPPY NEW YEARS INDEED!!!!

Leave a comment

Filed under Baking, Cooking, Food, Holidays, Uncategorized